Configuring a usable Android emulator
Here’s what the Android emulator looks like by default:
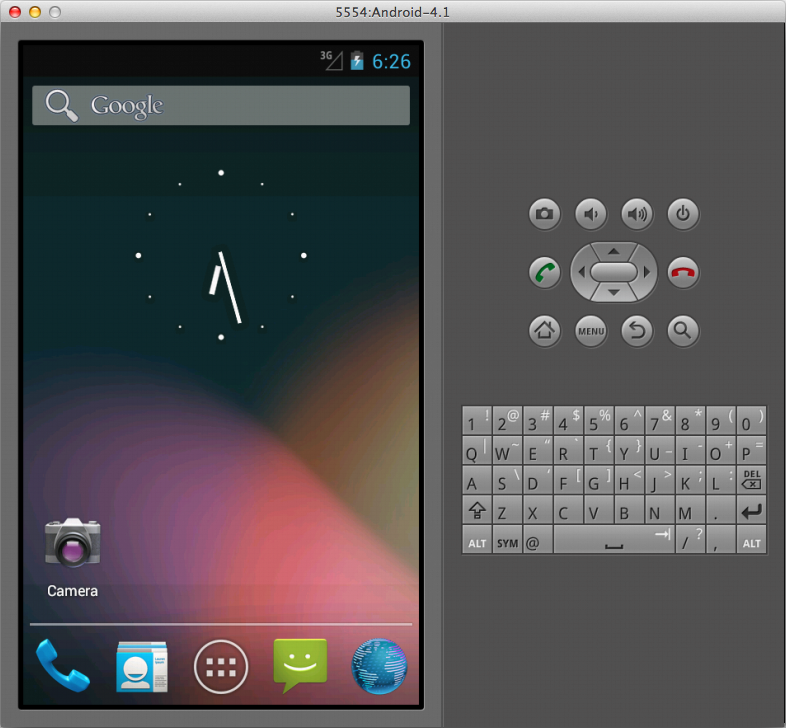
The most obvious problem looking at this screenshot is that it’s ugly. The emulator window takes up a huge amount of space on the screen and has an on-screen keyboard for no reason.
What’s not obvious if you havent tried this yourself is that it’s also unusably slow. The emulator pictured above took 5 minutes just to start up, and barely responds to input. There are three reasons for this:
- It’s not native. By default an ARM emulator is used, slowly translating instructions to x86 even though a native version is available.
- It’s not accelerated. Even if you select x86, hardware accelerated virtualization is not available automatically.
- It uses software graphics. GPU acceleration is also disabled by default, causing the emulator to run even slower.
Here’s how to solve these problems and regain your sanity.
-
Install the Intel Hardware Accelerated Execution Manager for your platform. It comes with the Android SDK and can be found at
extras/intel/Hardware_Accelerated_Execution_Manager. -
Launch the Android Virtual Device Manager:
$ android avd -
Click New and enter the following information:
- Target:
Android 4.1 - API Level 16. - CPU/ABI:
Intel Atom (x86). - SD Card: Size
512 MiB. - Skin: For a phone-sized emulator, I usually set the resolution to
320x528. For tablet-sized, I use1024x648. I add 48 extra vertical pixels to leave room for the on-screen navigation controls. -
Hardware:
Change these defaults:
- Abstract LCD density
160
Click the New… button and add the following:
- Hardware Back/Home keys:
no - Keyboard Support:
yes - SD Card Support:
yes - GPU emulation:
yes
NOTE: After adding and configuring each new hardware option, select another row in the list to ensure the new option is actually saved. Welcome to the hanging chad theory of UI design.
- Abstract LCD density
- Target:
-
Click Create AVD, but don’t start it just yet.
-
Due to what I’m sure is a really bad excuse, the x86 images don’t contain any Google APIs, so we need to add them manually. If you don’t need to use the Google Maps APIs, you can skip all this.
These steps are based on this blog post.
a. You’ll need a copy of the Google Maps files. The easiest option is to create an (ARM) emulator with the “Google APIs (Google Inc.) - API Level 10” target and pull them out:
$ adb pull /system/etc/permissions/com.google.android.maps.xml
$ adb pull /system/framework/com.google.android.maps.jar
You can also download the files from http://goo.im/gapps.
b. The emulator’s
/systempartition has 0 bytes free by default and although the the AVD Manager has an option to change this, the option doesn’t do anything.To work around this, quit the AVD Manager and launch your AVD from a terminal, specifying a larger partition size:
$ emulator -partition-size 512 @AVD_NAME(Replace
AVD_NAMEappropriately.)c. Push the Google API files to the virtual device:
$ adb remount
$ adb push com.google.android.maps.xml /system/etc/permissions
$ adb push com.google.android.maps.jar /system/framework
d. We’ll now build a new system image so this process doesn’t have to be repeated every time you start your AVD.
Download mkfs.yaffs2.x86 and push it to the device as well:
$ adb push mkfs.yaffs2.x86 /datae. Create the new system image:
$ adb shell chmod 755 /data/mkfs.yaffs2.x86
$ adb shell /data/mkfs.yaffs2.x86 /system /data/system.img
f. Pull down the newly built image:
$ adb pull /data/system.imgThis takes a long time. Now is a good time to get that stiff drink you’ve been thinking about.
g. Move the new
system.imginto the AVD’s directory. On *nx systems, this is at~/.android/avd/AVD_NAME.avd.$ cp system.img ~/.android/avd/AVD_NAME.avd/h. Start your AVD normally.
-
Congratulations! You now have a usable Android emulator.
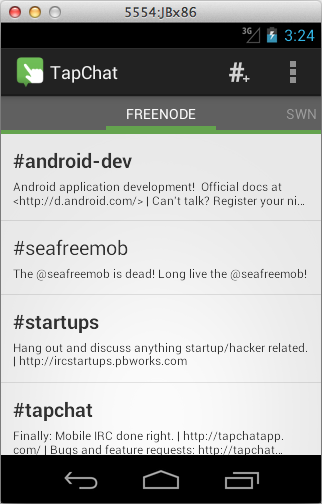
Unfortunately this probably means you’re about to start writing an Android app. Good luck.
A lot of very impressive work has gone into improving the emulator recently, especially x86 images, hardware virtualization, and GPU acceleration.
It’s unfortunate that not only are none of these features enabled by default, but the AVD Manager provides no notice that better performance is even possible. This leaves many developers with an unacceptably bad experience out of the box.
Poking around the Android SDK Git repository, I did notice some major changes underway to the AVD Manager, so there is some hope that this situation will improve. Until then, I hope you find this post useful.